Configuration
This section explains how to use the HotspotPred command, a new ModelX utility that relies on an SQL database filled with data from the Protein Data Bank. HotspotPred can be run either directly via the command line or using a configuration file.
ModelX Software
First, download the ModelX software and required files using the following links:
These files must be unzipped before use. Note that the database is large: 40 GB unzipped and approximately 120 GB once imported into MySQL. Ensure you have at least 130 GB of free disk space.
Required Files
To run the example, you will need the following files:
- HotspotPred.pdb – Input protein structure.
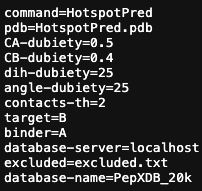
- HotspotPred.cfg – Configuration file for running the tool.
- excluded.txt – File listing excluded elements.
- HotspotPred_DB.sql – SQL database dump with all required data.
MySQL (via Workbench)
ModelX requires a MySQL server, which you can download here. A graphical installer (MySQL Workbench) is available here.
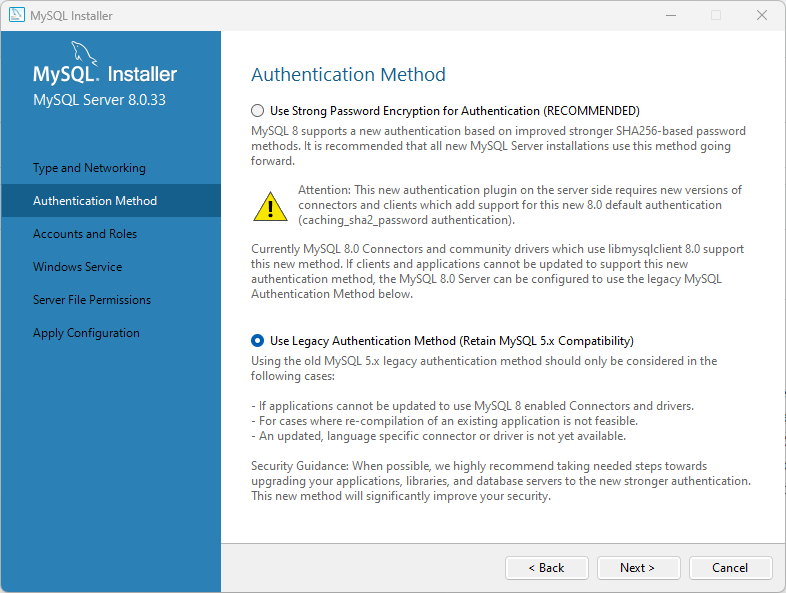
During installation, choose the Legacy Authentication Method to ensure compatibility:
MySQL may not accept short passwords in newer versions. If needed, create a custom user instead of "modelx". After installation:
- Create a user named modelx with password modelx and grant all privileges.
- Create a new connection in Workbench, naming it hotspotpred.
- Use modelx as both username and password.
- In the left panel, go to: Data Import/Restore → Import from Self-Contained File, and select HotspotPred_DB.sql.
- Create a new schema named PepXDB_20k and set it as the target.
- Click Start Import. This may take several hours due to the size of the database (expansion from 40 GB to 120 GB).
Do not close MySQL Workbench during the import process.
MySQL Command-Line Setup (Alternative)
If you prefer using the terminal, follow these steps to load the database manually:
- Open a terminal and connect to MySQL:
mysql -u modelx
- Create the database schema:
CREATE DATABASE PepXDB_20k;
- Exit MySQL:
exit
- Import the SQL file:
mysql -u modelx PepXDB_20k < /Users/rreche/Desktop/Modelx_HotspotPred_Linux/HotspotPred_DB.sql
This imports all tables and data into the PepXDB_20k schema.
This command-line method is functionally equivalent to using MySQL Workbench. Ensure the server is running and there's sufficient disk space.
For troubleshooting, refer to the full installation guide here.
Usage of HotspotPred
After database setup, you can run the HotspotPred command.
- Open a terminal and navigate to the folder containing the Modelx_HotspotPred executable
chmod +x Modelx_HotspotPred
- Ensure the directory contains:
- Modelx_HotspotPred
- HotspotPred.cfg
- HotspotPred.pdb
- excluded.txt
-
Run the command using the configuration file:
./Modelx_HotspotPred -f HotspotPred.cfg
or using the arguments in command line:
./Modelx_HotspotPred -c HotspotPred --pdb=HotspotPred.pdb --CA-dubiety=0.5 --CB-dubiety=0.4 --dih-dubiety=25 --angle-dubiety=25 --contacts-th=2 --target=B --binder=A --database-user=modelx --database-pass=modelx --database-server=localhost --database-name=PepXDB_20k > output.txt
For a full explanation of configuration parameters, see the official documentation.
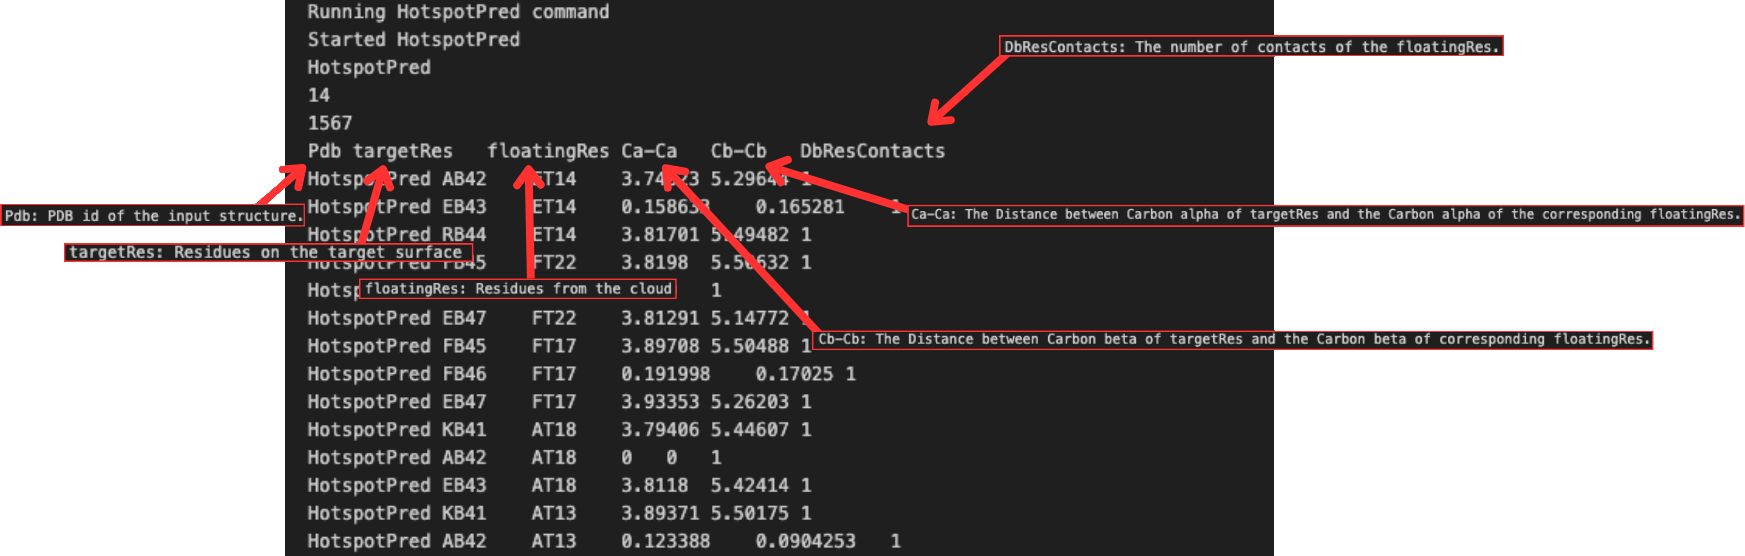
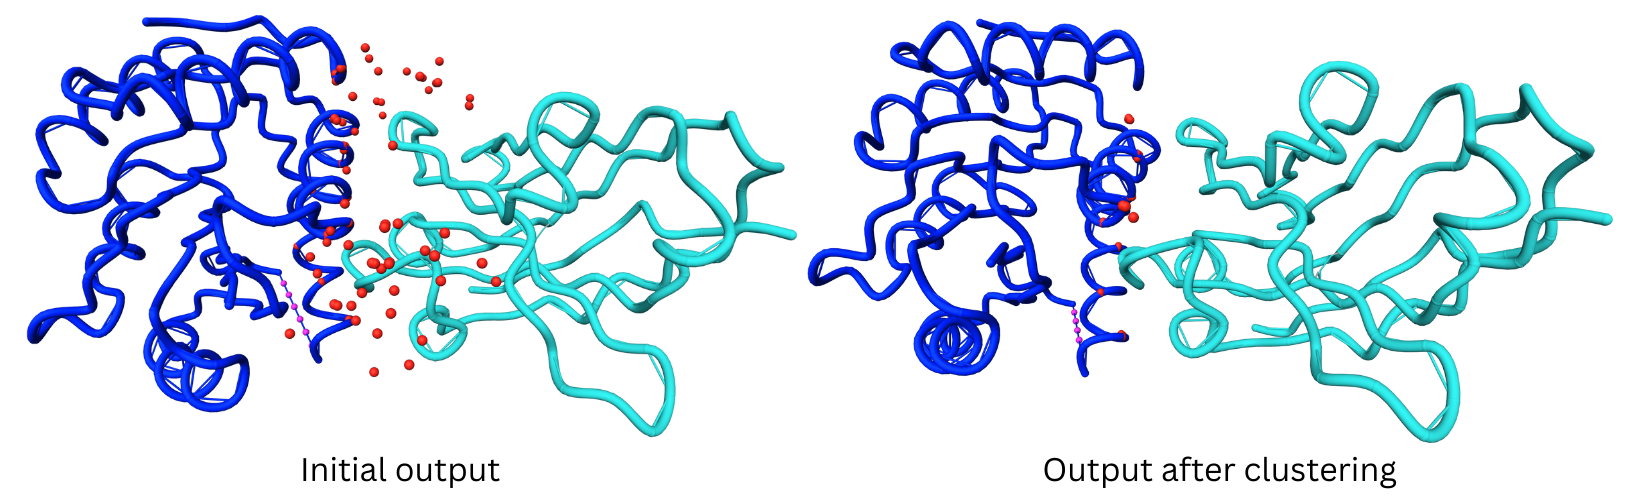
Expected output
- cloned_HotspotPredBA.txt – Pdb file with the HotSpot changes
- output.txt – File with all the energy values